Flemish Working Man

Tuesday, May 30, 2006

Finally, A Model...

Isn't he just the perfect picture of peasanty rowdiness?


We bought him a new belt at the faire. He quite appreciates having a way to carry stuff, and was chastising me for not including pockets in his costume (since I have em in my flemish costume, i guess that's only fair...)

I'd say the menfolk look pretty goshdarn cute....

Mine and Beth's Hubbies!

Friday, May 26, 2006

Bleary Eyed, but Finished

So, I stayed up til 1:30 last night making sure all was well for this weekends faire (we'll be on the road this evening).
I still haven't packed, but I have a centralized pile of costume things, and among them is the finished flemish man. Not even any handsewing left to do in the car on the ride down....

So, what I learned:
1) Pants suck. Or, the more optimistic version: I need more practice making pants.
2) My handsewing needs work. I ended up doing the doublet sleeve hems in handstitched linen thread. Which sounds perversely period (my new favorite term), except that I think in period they could sew much better than I (see below pic)
3) When making a doublet with skirting, leave a gap in the front for the loin pillow (if there is one). Cuz right now the codpiece doesn't "peek" like it should. Ah, nix that "no handsewing in the car" coment-- this might be something I fix then.
4) Buttonhole stitched eyelets are the shiznit. Oh yeah....
5) Next time, leave enough time to do the buttonholes by hand. the machine ones are nice, but not the same...
And, lastly......
6) Never, NEVER overstuff your walrus codpiece....

That's all for now. My model was not home when the outfit was finished (or when I went to bed at 1:30, so I have no pics of the finished product on him. This is the best I can do--at least you can see the fabric buttons:


Thursday, May 25, 2006

Ties with Attitude!

I went to the fabric store last night searching for the "perfect" ties for this costume. And, naturally, I ended up with perfectly synthetic ones. But they were thin and woven looking and RED. I remembered seeing red ties on a completely not-red outfit somewhere along the line (must fish out that picture to document...), and this just looks so cute:


And, why, yes! Those ARE hand-bound eyelets. I had an eyelet revelation after feeling quite stupid for not understanding them, and now I'm having lots of fun making them. Like Beth said, they're "perversely period." I get sick pleasure out of it...

Those are the beginnings of the jerkin in the dark green. I have since attached the skirting, and its waiting for the lining to be whipstiched in. I actually am really pleased with how the sleeve caps came out, not that you can see it well in this particular pic.

Left to do (tonight and in the car tomorrow, I guess):
Finish eyelets (11 left!)
Place codpiece
Buttons on the Jerkin (cheated--see below)
Buttonholes (time is running out, so i'm cheating and using the machine for this)
Hem the doublet sleeves
Attach closures for the pants
Pin the hat flaps up (they're floppy and driving me mad!)

My button cheat: Considering how little time I have to finish this costume (um, tonight, basically), I had to find a fast way to close the jerkin. Apparently, they have KITS for covering aluminum buttons in fabric. They've got horrible aluminum backs and are not period at all, but they give the right effect on the outside. The best part is that hubby was assigned to do them for me, so, i've got 13 fabric covered buttons and I didn't have to lift a finger! I figure I'll replace them when they start to fall apart and when I have more time.

Tuesday, May 23, 2006

No Pictures...

...But, I did manage to get a fair bit of handsewing done yesterday. well, a fair bit for me, anyway, seeing as I generally avoid it....

Finished whipstitching the waistband into the pants, and finished whipstitching the doublet lining in.

I even made a pitiable attempt at a real eyelet, since all my previous eyelets have been thread covered grommets. It was.... not good. :) Anyone wanna suggest a good online tutorial?

Monday, May 22, 2006

Loin Pillow'd!!!

Part I: The loin pillow
I convinced myself that the way to ease into this costume was to finally finish the codpiece. (Um, yeah, I did say "ease"...even though i've got only 4-5 nights left to finish this costume!!!) Manly costumes are not my cup of tea, apparently--just not as exciting as something I get to wear myself, therefore not as motivating. Especially when said man costumes have no embellishment and are made out of rather boring fabrics/colors....I hope I enjoy the thunderhosen more!

Anyway, after reading over Beth's creation of a codpiece, I started to think that the only thing the walrus/manatee needed were some subdue-ing stitches along the sides of the pouch.
I handstitched (yup, you heard it right--iIactually handstitched something!) along the sides, and I think this version is much more reasonable. I figure I'll try Beth's pattern for the thunderhosen's codpiece, but for this particular project I just wanted to finish what was already on hand, rather than start a new one. There's enough of starting new things later in this post....
With no further ado, the new, improved loin pillow. (yes, the pillow is offcenter, I've decided that's "period" cuz i didn't wanna fix it):


Manatee'd!!!

Gotcha!!!! ;) Okay, really:


Part II--the pants
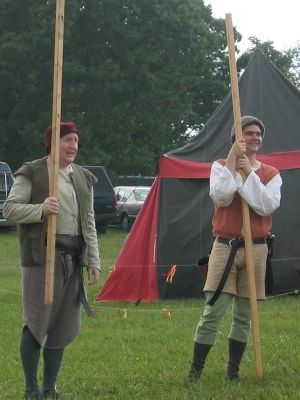
So, with the codpiece functional it was time to move onto something else. You may remember that hubby's pants were rather ill-fitting. Everytime he sat down he bared a large bit of ye olde plumber's crack. I tried to fiddle with the existing pants to fix this--moved the crotch seam, thought about adding a larger waist band....but in the end, the only answer was new pants. Le sigh. Again.

I had *just* enough of the walrus colored fabric to eek out new pants. I actually sacrificed a pair of hubby's modern pants to figure out construction and what works on him. Convenient that I chose a pair to sacrifice that I absolutley HATE. He won't be wearing those again. Mwahahahaha!

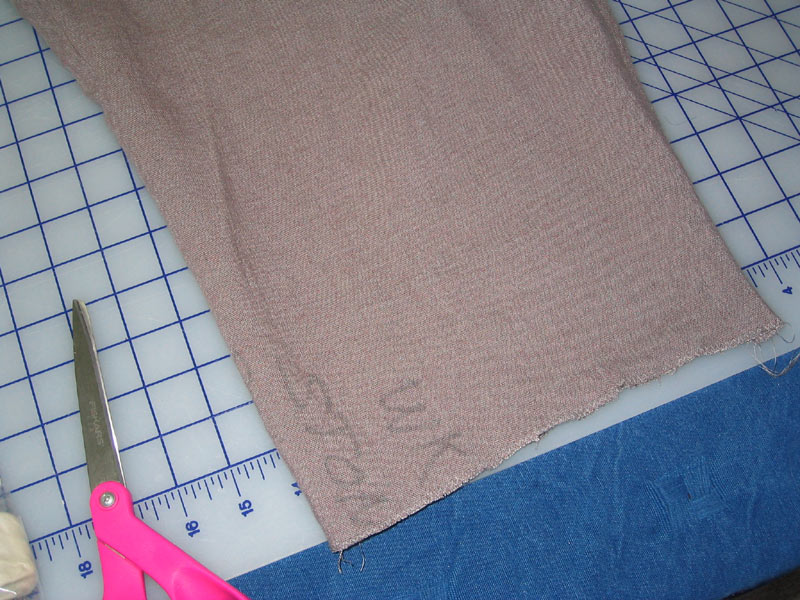
Anyway, I finished them (minus the waistband) and then discovered a huge problem with the fabric....

Why, oh, why, did joann's write on this fabric???!! And why, oh, why, wasn't I made aware of it and at least given a discount?

Grrrrrr....
Anyway, at least the costuming gods were on my side with this (must've been the ugly pants sacrifice), cuz its in a place that I was planning to cut/taper anyway, like the last pants.

So, taper I did, and the writing is gone. they are hemmed, and the waistband is attached, but needs to be whipstitched down on the inside. A bit of handsewing I might pull out at lunch today.

In other news, i'm working on whipstitching the pale green doublet's lining down, and I finished its bottom hem last night.

What's left?:
Handstitching the pants band
Handstitching the doublet lining in
Hemming the doublet's sleeves
Constructing the jerkin--this is where most of my work lies
Many, many eyelets, and,
Hoping the hose I ordered come in time....

Tuesday, April 18, 2006

A Comedy of Errors

Yes, my weekend was chock full of sewing evilness. I admit to not finding it all comical. The pants I altered to fit "better" ended up with too short a waist/crotch, and now I definitely have a flemish working man. Particularly if that work were, say, plumbing. I shan't show a pic here, cuz I figure hubby would prefer to NOT have certain cracks and crevices published on the intra-web. I am still considering what to do with the pants. I might have enough fabric to start over from scratch. Or, I could try some advice from Beth and see if i could just lower the crotch. I might try that first, at any rate, to conserve fabric.

The second (very amusing) and very....LARGE....mistake I made was on the codpiece. We have deemed it the walrus. Coo-coo-Ka-Choo.... Though, I think it actuallylooks more like a manatee.


cod front


cod side

Hubby says its too big. Too prominent. Considering the simplicity of the rest of the outfit, I'm inclined to agree. Apparently, Adam is afraid he will get heckled for this. And as I don't ever want to see him embarrassed (okay, maybe just a bit, but not THAT much), I will try to make this a little more subtle. I will try codpiece v2.0 with a scaled down version soon. The original pattern is from Margo Anderson's Elizabethan Man's Packet. There were two sizes in the pattern pack, and I actually chose the smaller. But not small enough, apparently.

Below, you can see the codpiece pattern, and in the same pic, the hat pattern I made up. The hat is actually the only bit of sewing I did this weekend that hubby likes. 1/3. At least I'm batting better than zero.

patterns

In all its goofy splendor, I give you that hat. I used the same red wool from my flemish sleeves (had just a bit leftover). I made it to hopefully look like this one. The seams are purely my own decision, so I can't vouch for period correctness at all, but I think it at least has the right effect, right down to the pseudo-brim, which was purely serendipitous.

hat side

And a few detail shots:


flaps down-- sorta like this.


hat back

That's all for now. More when I work on fixing the plumber crack pants... And downsize the walrus.

Wednesday, March 22, 2006

Dancey Pants

Okay, so this is the hemline that i'm playing with for the pants. Advice/comments from the peanut gallery before I cut and sew?

pant "cuff"
The pants, like so many other things lately, are a bit ill fitting. You can see it here, how the crotch is quite low. I think I don't care. Cuz to care means to find new fabric. And I rather like this fabric. I also kinda think that the codpiece will distract from whatever is underneath it, so it probably doesn't matter. Hurray for codpieces! Also, here is hubby doing his best peasant dance. Look at those rosey cheeks. So. Perfect.

peasant dance

Tit for Tat Hat.

Beth expounded on hats this morning. I feel I should reciprocate. Hubbys sketch (which he did for his own costume, so it must be what he wants, right?) shows a close fitting skull cap type thing. I thought, why not make this more "fashionable"? You know, purely depending on your definition of fashionable.


flap hat-bruegel peasant dance

Looking more closely at hat styles, I see that this particular skull cappy cap has earflaps. Oh, what fun....


flap hat-privatelyheldpbruegelyounger

Then, I found this one in a privately held p. breugel painting. Slightly different ear flaps, but very much the same. This one lacks the extension and what i think are ties of the previous one.


flaphatflip--privately held van cleve

Oh, look, we have "fashionable options" here. This rebel has flipped his flaps up! Oh my, the scandal.

So then, all I had to do was get hubby's approval. He looked at me and said "no way am i wearing ear flaps." So I confidently showed him Mr. Earflap Rebel, and now I'm allowed to make the hat! Huzzah! I think I might even make it red. They do seem to like their red hats. Whether it matches or not.